Resizing a VirtualBox Virtual Machine (Debian) hard disk with LVM
Update October 2018: This article is pretty old and I now generally use docker for development. Proceed at your own risk!
Recently I was backing up a site to my development VM when it suddenly started complaining about lacking available space. I started looking around in virtual box to see where I could increase the disk space only to find out it was not going to be a simple task.
I found quite a few good resources for resizing a VM hard disk, but none fit my setup completely, so I thought I’d document it here for future reference. Of course, make sure to backup data before you start working on resizing your own VM. I’m currently running VirtualBox 4.3.10, your setup may differ from mine.
Remove Machine
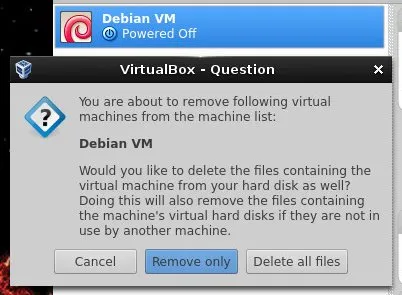
First step is to remove the VM from the VirtualBox Manager. Select: Machine -> Remove.
Make sure to click ‘Remove Only’, else you’ll have nothing left to resize.
Clone & Resize the Disk
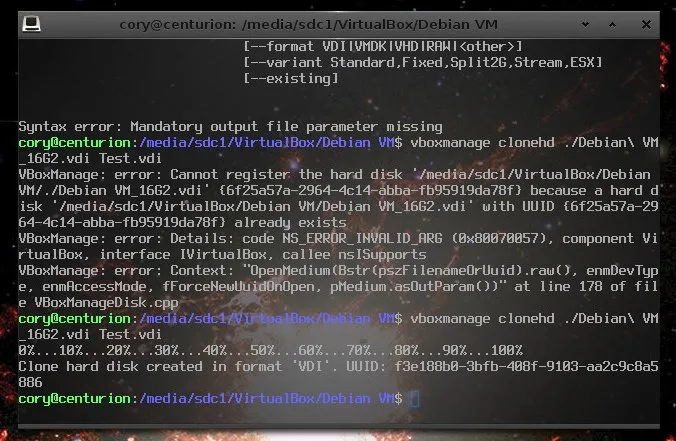
Open up a terminal, navigate to your VM disk, and clone the existing disk with the command line tool vboxmanage.
vboxmanage clonehd ./Old_VM.vdi ./New_VM.vdi
This may take a minute. While you’re waiting, go ahead and download a GParted Live Bootable Image. We’ll use this to expand the partition once we’ve resized the disk.
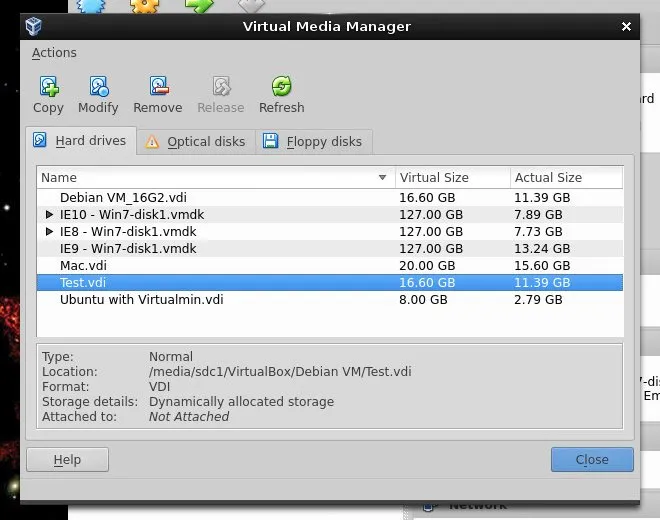
Before we resize the cloned disk, we may have to remove it from the VirtualBox Manager. In the VirtualBox Manager GUI, navigate to File -> Virtual Media Manager and remove the new disk. Again, make sure you keep the file.
Now we can resize the cloned disk with vboxmanage.
vboxmanage modifyhd --resize 20000 ./New_VM.vdi
Resize the Partition
Now we can add the machine back into VirtualBox. Before we can add it though, once again we need to go to File -> Virtual Media Manager and remove both the old disk and the newly resized disk.
Now add the machine back under Machine -> Add. You’ll need to navigate to where your virtual machines are stored and select the correct vbox file.
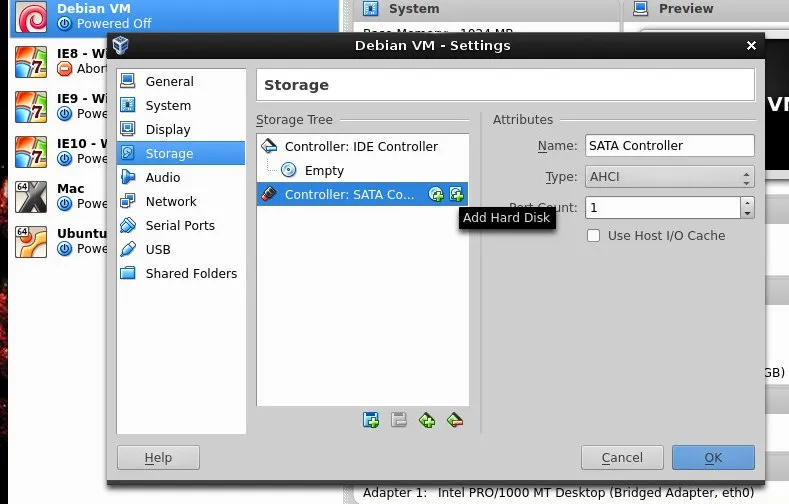
Once the machine is back in, open the settings on it and swap the disk drive in the storage section. This is where you will also mount your GParted iso into the VM, so when we first boot up we can resize the partition.
Run the VM and when GParted boots, resize the extended partition and then the lvm partition and reboot the VM.
The VM should have ejected the GParted disk and now you’re VM will load as normally. You’ll need to make sure you have both the lvm2 package and resize2fs (e2fsprogs package in Debian) tools installed.
We can use pvdisplay (run as root) to show info about the logical volume, including it’s path and size. Resize it to the desired size using the LV path to specify the volume:
sudo lvresize -L +4G /dev/addlimedev/root
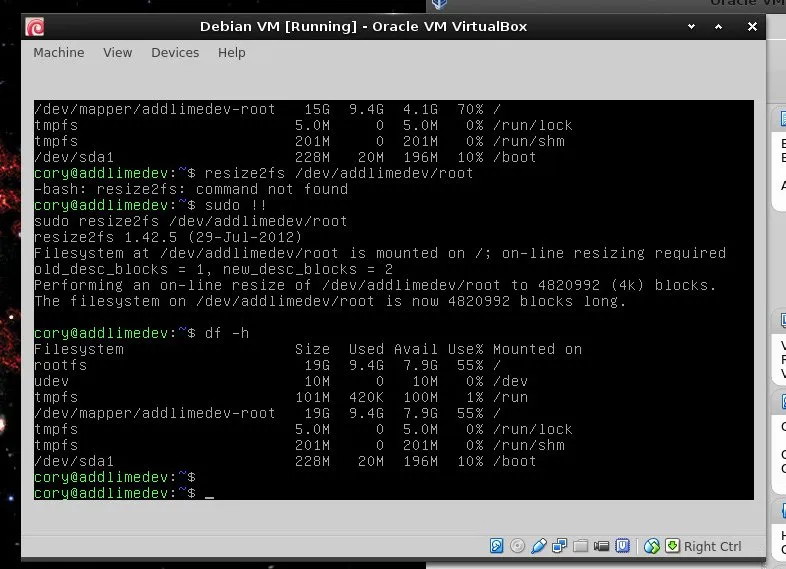
Now we just need to use resize2fs to expand the size of the filesystem.
sudo resize2fs /dev/addlimedev/root
And verify we now have our newly acquired space:
df -h
Success! A little more involved of a process than I’d like, but that’s all there is to it.
Resources
Here are a few helpful resources I came across while figuring this whole resizing deal out.
Resize LVM PV Partition in Debian/Ubuntu Extending the size of a virtual disk in VirtualBox + resizing Linux LVM partitions forums.virtualbox.org How to resize a Virtual Drive
